Halloween Slime Kits with Shaker Window!
We are so excited to have the talented Amy Robison as a guest blogger today! Not only is she a contributing artist for Silhouette, but is also somewhat of an expert at designing children’s themed parties, gifts, and crafts. Don’t take our word for it, see for yourself!

Hey! Amy Robison here! I’m so excited to share a fun party I created this week with the Shaker Windows & Confetti Thin Cuts, loose sequins, and Hello Pumpkin collection. If you follow me onInstagram stories then you already know that I am obsessed with the shaker windows after trying them out this week. I want to use them on everything! I already have a million ideas for Christmas. I’m getting a little ahead of myself, so I’ll calm down and focus on the party I’m sharing today— a slime making party. If you’re like me, then you hate this slime craze that has been going on for a few years. (It’s the worst!) Who started this? haha! My kids still love it though, so I decided that I just have to embrace it occasionally. Plus, how perfect is it for a Halloween party?

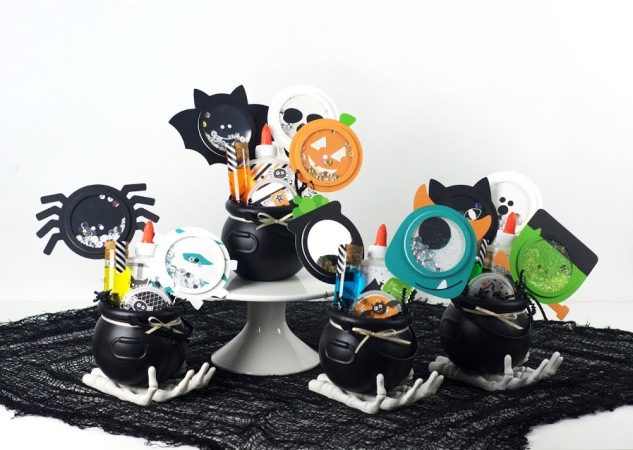
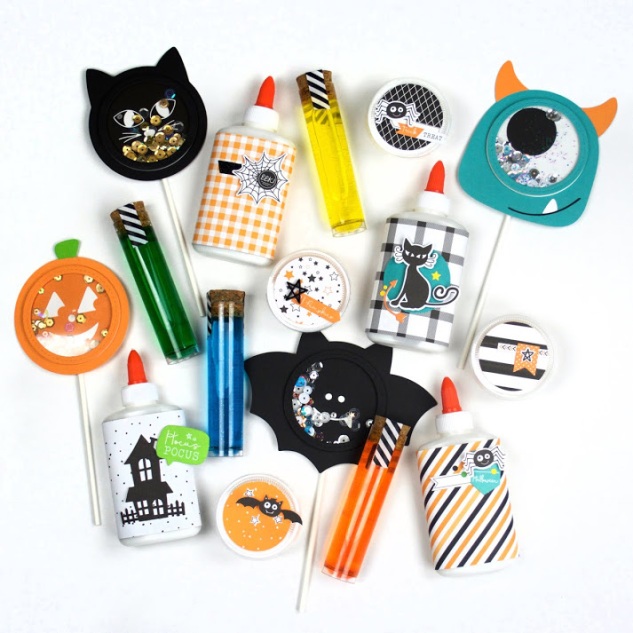
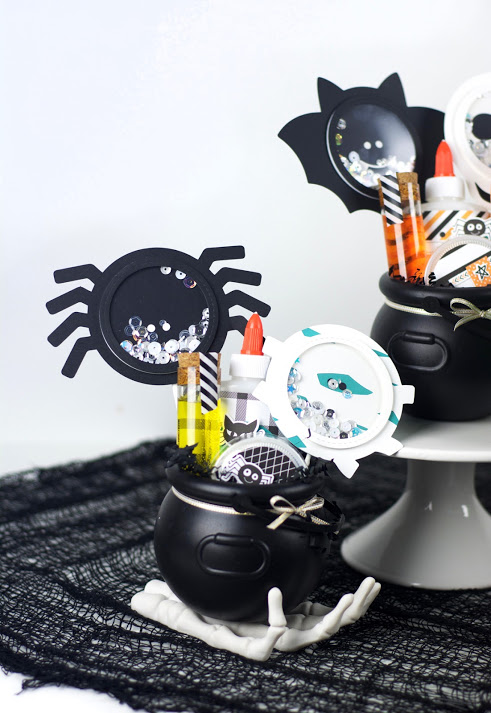
I started out by designing a few characters I could use with the shaker windows that would be festive for the holiday. I’m loving their simplicity and how they turned out. Once they were all designed, I added the shaker windows to each one. If you haven’t used the shaker windows before, I included a simple tutorial. They are a piece of cake and you’ll absolutely love them!
Shake Window Tutorial

Step 1: Remove the outer foam ring leaving the middle square foam adhesive to use for other projects. (Such a genius design so all that empty space isn’t wasted.)
Step 2: Place the foam shaker window ring on your project. It is very sticky, so you know it will stay right where you put it!
Step 3: Fill with sequins, glitter, sprinkles or any other fun media. This loose sequins mix is so beautiful! I can’t get enough of it, and it’s available in gold too!

Step 4: Remove the protective paper on the ring to reveal the adhesive.
Step 5: Peel the protective film off of the acetate circle. Use washy tape to help peel it off. This was a little tip I learned from the Close to my Heart creative team. Such a huge help!
Step 6: Place the acetate sheet on top. Press down to make sure everything is sealed in place.

Step 7: Using the Shaker Window Thin Cuts, cut out the finishing border in your choice of coordinating paper.
Step 8: Glue the border on top to finish.
Step 9: I taped a sucker stick to the back so that I could place them in my kits. These would be cute in gift baskets, too, as a tag to the recipient.

Once I finished all the shaker window characters, I gathered the supplies for the slime kits. I used the Hello Pumpkin collection to wrap and embellish the supplies and containers to make them look more cohesive and “pretty” everything up a bit.

Each kit has everything needed to make slime including fun sequins to mix inside to make it extra special. I love making each guest feel important and special. My guests are usually small children and I love the look on their faces when they see what is waiting on the table just for them. It’s the best and keeps me doing all these crazy parties.

Have you used the shaker windows before? Hopefully I have sparked some ideas of fun new ways you can use them in your next project.


No comments:
Post a Comment
What did you think? Please leave a comment and make my day!