Showing posts with label techniques. Show all posts

Tuesday, July 28, 2026

Split Design Card

Sometimes you just need a quick and easy card but you want it to WOW the receiver. This is the design for you and the Artisan Sketched Garden DSP is the paper to use!

For this design you simply cut the DSP into 3 sections. For fun, I cut it into 3 triangle pieces. You could do strips, squares or any shape you like. Then you add color to what will be the middle piece. Again, the coloring can be simple and quick like using Blending Brushes or can be a bit more like I did here using Stampin' blend markers, but even that didn't take long. 


After adding color you glue the pieces to your card base. Using a bold card base helps the colors pop and really make an impression. 

Add some embellishment type details to finish the look and you've got a really pretty card that will make whoever you send it to smile. 

Give it a try! You'l be impressed with how easy it is to create.

Michelle Loncar
Independent Stampin' Up!® Demonstrator 
MichelleLoncar.stampinup.net
Images©Stampin' Up!®

#showandtellwithmichelle #cardmaking #artisangardendsp #techniques

Friday, July 3, 2026

Black Out Card ~ Color Dare #711

 Welcome to a new color challenge from our Design Team at Color My Heart Color Dare. Each Friday we give you a new palette of colors to inspire you. Use them to create any paper craft you like. 

For this color challenge you must use at least 3 of the colors shown in our graphic below. We also give you some Free colors to use with the challenge colors if you like. Do Not add any colors beyond that. 

I was recently reminded about the Blackout Technique and thought this colors palette would be great for this technique. It's very easy to do and creates a stunning look! Let me tell you about it.


First you need an embossing folder with a design you can color in. This Lazy Daisy EF is a great example. After embossing your card stock, turn it to the side that is de-bossed (where the design goes in). Color these indentations of the design with Stampin' Blend markers. Bright colors work the best. You don't have to be careful, just get that colors on the design.

After you're finished coloring you take a black ink pad and swipe it across the card stock you just colored. The black ink colors the background and can add a bit of detail to the design. Keep swiping the black ink until the surface is covered. Sometimes I even rub the pad in a circle to get good coverage. Look at how the colors pop! 

Just for fun I added a die cut border. Splatters were added by flicking the brush tip of the marker against the inside of the cap. A cute sentiment layer is popped up and finishes the design. Because of the embossing folder design, I decided there was plenty going on and did not add any gems this time. It's a rare thing but sometimes it happens! Haha. 

I also added the embedding to the envelope flap and some splatters all over the envelope. By the way, I used our Basic White Note Cards and Envelopes for this project. The cards are 
3-1/2" x 5" and perfect for a little note. I left the inside blank for now. When I use the card I'll add a custom message.
Direct link to Color Dare #711

Now it's your turn to create with our color challenge. We can't wait to see how you're inspired by these colors! Have fun creating!

Michelle Loncar
Independent Stampin' Up!® Demonstrator 
MichelleLoncar.stampinup.net
Images©Stampin' Up!®

#showandtellwithmichelle #colordare #colorchallenge #blackouttechnique

Thursday, May 21, 2026

More Fern & Flora......

As promised yesterday, here is another way to use the Vellum with the Fern & Flora Embossing Folder. Coloring on the back of the Vellum can really give a pretty look with soft colors. I admit, this card did not turn out how I thought it would. I knew I wanted to color the Vellum but after that it was created on the fly. Sometimes you just need to go with it as it happens.


This time I added a frame around the Vellum. The little tag is from the same set: Phrases & Frames Bundle. The sentiment is from the Lily of the Valley stamp set. I needed/wanted a tiny sentiment and this fit perfectly! I popped it up on Dimensionals and inked around the edge with a marker. 

For the upper corner I wrapped a ribbon around to the back. Using twine I tied a bow then tied it to the ribbon. I really like the way the two look together. Using the ribbon for a bow was too much, but the twine was perfect.

for a final touch I added some pretty Antique Pearls around the lower right. The pearls kind of take on the color around them and have a touch of green.


This is a photo of the Vellum after I finished coloring. Because it was embossed I colored on the back or de-bossed side (where the design goes in). Using Stampin' blends I colored the areas I wanted. You can see it's not a perfect look on the back but when you turn it over it looks fine. When coloring Vellum use strong shades as the Vellum diffuses the color. I used the dark Blend of each color shown.


After die cutting the Vellum for the frame on the front I had this leftover piece. It was too pretty to throw away so I used it on the inside! Keep those scraps and see if they can't find a place in the project, too!

I hope you enjoyed this look with coloring Vellum using markers. Why not give it a try?

Michelle Loncar
Independent Stampin' Up!® Demonstrator 
MichelleLoncarlstampinup.net
Images©Stampin' Up!®

#showandtellwithmichelle #fern&flora #cardmaking #vellumtechniques #phrases&framesbundle


Wednesday, November 5, 2025

What's Up Wednesday ~ Triangle Twist Card

 Welcome! Today I have a fun technique card to share with you. I don't know it it has an official name or not but I'm calling it a Triangle Twist card. As we get into it I think you'll understand why I call it that. 

The card is a 4" square when closed. It still goes into a a medium sized envelope. There is also an easy way to make multiple cards at once!

To open the card you pull on the upper right and lower left Cornes of the card to make it unfold.


Start by using our 12" x 12" Two Toned cardstock. To prep for 3 cards at once score your cardstock at 4" and 8".  Now turn the cardstock 90 degrees and cut at 4" and 8". You now should have 3 pieces of 4" x 12" CS with score lines at 4" and 8". 


To score the diagonal lines take one piece and tip to the right lining up the corner of the CS with the end of the first score line. Score. Turn the piece so the bottom square is at the top. Again, tip it to the right and line up the corner with the end of the score line. Score. That's it!


Here is the card partially open. You can see how the scored lines work to create the triangles. You need 3 pieces of pattern paper cut to 3.75" squares. Two of those pieces are cut on the diagonal. Line up the diagonal edge along the fold and glue it down. Do the same with the other sections. The 3rd piece goes in the center of the card. Use a piece of white CS for your message and signing the card. Decorate the front with a die cut image. Be sure to only adhere it to one side of the diagonal line. Here I used foam to pop it up. I added a sentiment piece and inked the edges of the CS to make it stand out a bit from the pattern paper.


Here the card is all the way open. It's a fun card to make. Why not give it a try?


Thanks for stopping by. Come back often for more ideas!


Michelle Loncar

Independent Stampin' Up® Demonstrator 

Images©Stampin' Up


#showandtellwithmichelle #triangletwistcard #cardmaking


Friday, September 12, 2025

Small Floral Look ~ Color Dare #669

 Hello! You know what Friday means.....a new challenge from our Design Team at Color Dare! Each Friday we give you a new color challenge to get you started. You take it from there creating any paper craft you like. 

For this challenge you must use both colors in the graphic below. There are Free colors you can use in addition to the shown colors. Do not add any colors not shown or listed in the graphic. If you care combining challenges remember to be careful of our color rules.

My post for What's Up Wednesday this week was on ideas for using the small images of a stamp set as the star of your project.  Click here to see the post. In that post I promised I had one more idea to share in that series of cards and here it is!

Keeping the white on white theme of the other cards this version uses a trio of the small flowers as the focal point. The flowers are colored with markers in Fresh Freesia and Soft Sea Foam. There is a shimmer to the flower head from Wink of Stella. I don't think you can see it in the photo as it's very hard to get it show up, but trust me, it's there. 

A piece of white CS is cut just a bit smaller than the card front then embossed for that lovely pattern. The center of the embossed pattern has a blank area the same shape as the die cuts. The silver die cut fills that area. Next I place the ribbon across the piece and used Glue Dots to secure it to the back. The floral layer is popped up with Stampin' Dimensionals to give some depth to the design. A small gem was placed on the top layer for a bit of sparkle.


Direct link to Color Dare #669

Gallery Bloom stamp set

Peaceful Greenery 3D Embossing Folder

Peace on Earth Dies

Silver Foil Paper

Drusy Adhesive-backed Embellishments

A few basics also used:
Now it's your turn to create and share using our Color Dare Challenge. We can't wait to see how you use our colors! Have fun!

Thanks for stopping by! Come back often for more ideas and inspiration. 


Michelle Loncar
Independent Stampin' Up® Demonstrator 
Images©Stampin' Up


#showandtellwithmichelle #cardmaking #techniques #galleryblooms

Wednesday, July 23, 2025

What's Up Wednesday ~ Sunflower Embossing Folder Technique

Are you ready to be amazed? This technique will do that for sure!

Our Sunflower 3D Embossing Folder is pure magic! 

  • Use it all by itself on cardstock for a beautiful look. 
  • Add some ink to take it up a notch.  
  • Use it on DSP to kick it up higher.
  • Swipe ink across the raised design to take it to the top!!!
This pair of cards were done with embossed DSP then ink swiped. The results are stunning and the variety can be endless. 


The card on the left was created with Everyday Skies DSP, Country Woods DSP with Misty Moonlight and Calypso Coral inks. 

The card on the right uses Beautiful Bokeh DSP, Country Woods DSP, and Balmy Blue and Fresh Freesia Inks.

The sentiments were created using the Happy labels Punch, 1-7/8" Circle Punch.  Rhinestones accent the look. Cardstock used: Misty Moonlight, Basic White, Fresh Freesia.

Step 1
Emboss the DSP before trimming down the 6"x6" DSP.  In the photo the left DSP is embossed but the right one isn't. Thee is so much color to work with in these DSP packs!


Step 2
Swipe the edge of the ink pad across the embossed (raised side) DSP. Holding the ink pad at an angle helps. The flatter the angle the more ink goes onto the DSP, so be careful. You can always add more ink but you can't take it away if it's too much. 

Use one color of ink or several. It's up to you. I've used 2 colors on my cards. The color choices come from those listed on the pack of DSP making it easy!

In the photo below I swiped the Balmy Blue ink all over except for the lower right corner. The top area was swiped with both colors. You can see the differences in no ink, to 1 ink color to finally having 2 ink colors blend and created so much depth!


Step 3
Now it's time to trim the DSP. Mine are trimmed to 4"x 5-1/4". Perfect for layering on a card front. Save the slim scrap to use on the inside of the card. Keep the other piece for a future project.

The way I cut the DSP I have a piece for the card front, one for across the bottom on the inside and one nice sized piece for a future project.


At this point you're ready to finish your card. Mount it on the cardstock color of your choice. Accent with a sentiment and gems of your choice and you have a beautiful card to send to someone!

Everyday Skies DSP

Beautiful Bokeh DSP

1-7/8" Circle Punch

Happy Labels Pick a Punch

Thanks for stopping by for What's Up Wednesday. Come back often.....not just on Wednesday. Have a great day!


Michelle Loncar
Independent Stampin' Up® Demonstrator 
Images© Stampin' Up


#showandtellwithmichelle #whatsupwednesday #cardmaking #techniques #embossing #sunflowerembossingfolder

Wednesday, July 16, 2025

What's Up Wednesday~ Shrink Wrap Trick!


Shrink Wrap Trick!

Want to try something new and magical in your next paper crafting session? This WOW Tip from Stampin’ Up! uses Iridescent Treat Bags and a heat tool to create incredible textured panels that add shimmer and shine to any project!

Here’s how to create this impressive look:
Step 1:
Slip a piece of Basic White Cardstock inside an Iridescent Treat Bag. This becomes your base.

Step 2:
Using a Heat Tool and holding it about 1–2 inches above the bag, heat in a side-to-side motion until the bag begins to shrink around the cardstock. Flip it over and repeat on the other side.
Safety First! Work on a heat-safe surface. Hold the bag with a tweezers or similar tool. Don’t hold with your fingers!

Step 3:
Once cooled, cut the shrink-wrapped cardstock into three panels. You can reheat along the cut edges to help reseal them for a nicely finished look.

Ready to Try It?
These shiny and crinkled panels are perfect for adding texture to cards, tags, and gift packaging. The iridescent finish catches the light in the most beautiful way. Photos don’t do it justice!

Products used on the card above:

I hope you give this fun trick a try! It's a great way to use the Iridescent Treat Bags in a different way. Anytime you can use your products in multiple ways it makes them even more economical!


Michelle Loncar

Independent Stampin' Up® Demonstrator 

Images©Stampiinup


#showandtellwithmichelle #techniques #cardmaking 

Friday, January 10, 2025

Two Step Stamping ~ Color Dare #634

How about a new color challenge from our team at Color Dare?! This challenge has you using at least 3 of the colors shown in the graphic. See the graphic for the fine print.

Make any paper craft you like. When you're ready to join our challenge, click here. 

I used a new stamp set from our Jan. - April Mini Catalog called Natural Botanicals. What makes this stamp set special is it's design. The images are designed so that you can use BOTH sides of the stamp! I used the solid side for the "shadow" images and the detailed side on top. I offset the images but you can also line them up if you like. 

To make a better match to the colors of the challenge I did 2nd generation stamping with the ink. If you're not familiar with that technique it's quite simple. First you ink you stamp as usual. Next you stamp it on scrap paper THEN stamp on your project. You get a nice lighter tone of the ink this way.

See below for the products used on this card.


Direct link to Color Dare #634

Natural Botanicals 


Simply Said


Bloom Impressions DSP


Three Color Glimmer


Take Your Pick Tool
This is a great tool with additional tips to help you do all kinds of tasks. It comes with what you see in the photo. You can also get tips for cutting, rotary designs, a poker and additional putty tips. For this project I used the putty tip to place the sequins making it very easy!


Nested Essentials Dies

A few more products used:

Now it's your turn to create and share with our colors. We love seeing how you use the colors in your creation. 

Have fun!

Michelle Loncar
Independent Stampin' Up Demonstrator 

#showandtellwithmichelle #cardmaking #colordare #colormyheart #colorchallenge

Saturday, August 10, 2024

Heartfelt Punch Background Card

Here's a great idea! Use a shaped punch to create a fun background. I punched out 3 paper patterns then glued them to a piece of cardstock. I used white but you could use any color that goes with your paper. Trim the overhang from the edges and layer on a card. it's that easy!!!

I kept the sentiment simple by stamping in black ink on white cardstock. To dress it up a bit I wrapped some jute time around one end, popped it up with foam and added a couple sparkles 

See below for a lit of products.


Heartfelt Hexagon Punch

Iconic Celebration DSP
A great variety of for all occasions!

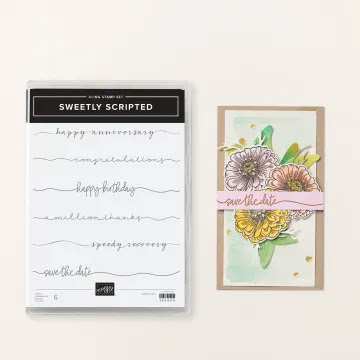
Sweetly Scripted Stamp Set


2023-2025 In Color Jute Trim


2023-2025 In Color Opaque Sparkle Dots

Just a few more basic items:

It's really easy to create a background like this. Give it a try!


Michelle Loncar

Independent Stampin' Up Demonstrator 


#showandtellwithmichelle #cardmaking 

Tuesday, June 18, 2024

Pop Up Gift Card Holder

Today I'm sharing a gift card holder card. It starts out as a regular card. The fun part is the easy to make pop up element for the inside that holds the gift card.  Let's take a look! 

As I said, make the card as usual on the outside. Here I added texture and details that go well with the Designer Paper Series (DSP). I love this style of DSP. It's so pretty and can be the star of the show all on its own! This is just a small piece of the paper and it still shines.

I kept a tone on tone color for the surrounding area and added a pop of color with the dragonfly. 


Now on the inside is where the action is! The pocket for the gift card is 4" x 3" then scored in the middle and folded in half to make a 4" x 1-1/2" pocket.  Glue the edges leaving enough space for the gift card to fit inside. 

The pop up element is very easy to make. Using a piece of cardstock 1" x 2-1/2", score every 1/2". Create a "box" and glue the overlap sections together. Next is to glue this to the inside of your card. Now you are ready to glue the pocket to the pop up piece. when the card is opened the gift card raises to greet the recipient! How fun!

See below for products used to make this card.


Thoughtful Journey 6"x6" DSP


Happiest Day Stamp Set


Wildflower Design Dies
There is a coordinating stamp set for these dies, too!
Bundles are an extra 10% off in JUNE!
Wildflower Design Bundle 

Other products used:
CTMH products: (Stampin' Up equivalent)


Thanks for stopping by! Come back often for more ideas! I love to share what I learn.


Michelle Loncar

Stampin' Up Independent Demonstrator

#showandtellwithmichelle #stampinup #cardmaking #technique

September - December 2026 Catalog is LIVE!

  It's LIVE today!  Our NEW September -December 2026 Catalog! Full of products to keep you crafting through Fall and Winter, Halloween a...