
I needed a couple of gifts for dear friends that are retiring and only had a short time to come up with an idea. I decided to give them each a box of my handmade cards and made a pretty box to put them in! I love how it turned out and hope they do, too.
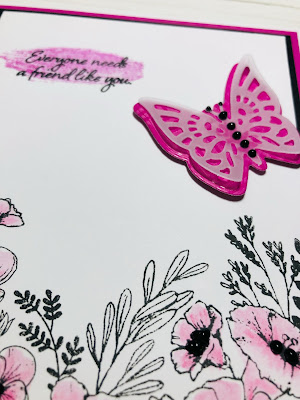
The card was made to go with the colors of the box. I stamped the image in Intense Black Exclusive Inks. I knew I'd be using a water brush and needed a colorfast ink. I colored with Watercolor Pencils and blended with a Water Brush.
The ink behind the sentiment is 2nd generation Wild Berry. To do this you ink your stamp, stamp it on scrap paper then stamp on your project.
The butter fly is the smaller one from the Thin Cut dies. Both butterflies have their top layer cut from Vellum. The other layers are from the Wild Berry Blast Paper Packet and Wild Berry Blast Coordinating Cardstock.
Other products used are a card from our White Cards and Envelopes Value Pack, Cardstock in White Daisy, Black and Wild Berry.


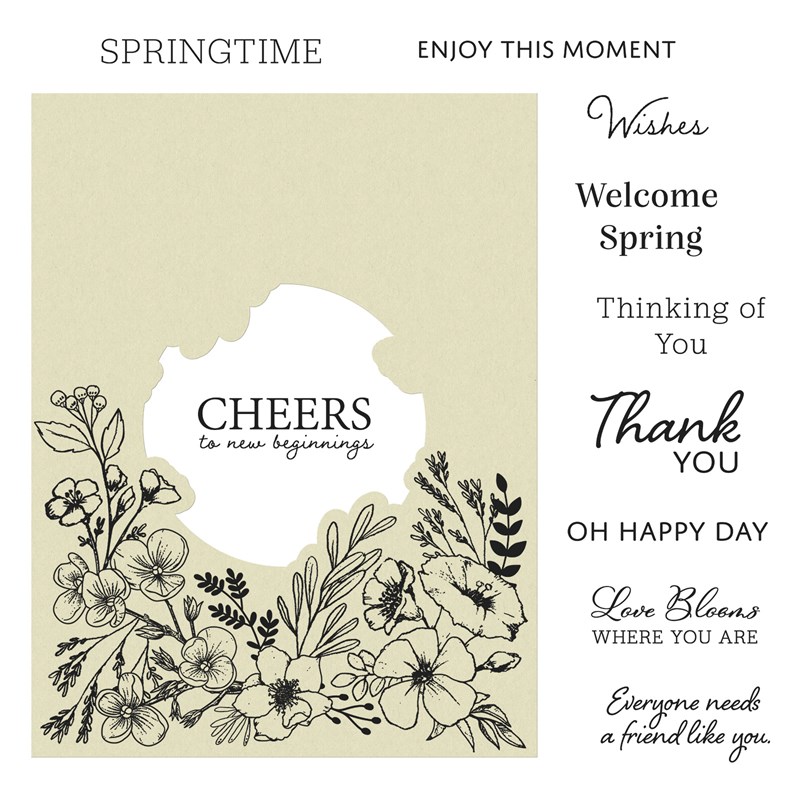 |
| In Full Bloom Stamp Set + Thin Cut Dies |
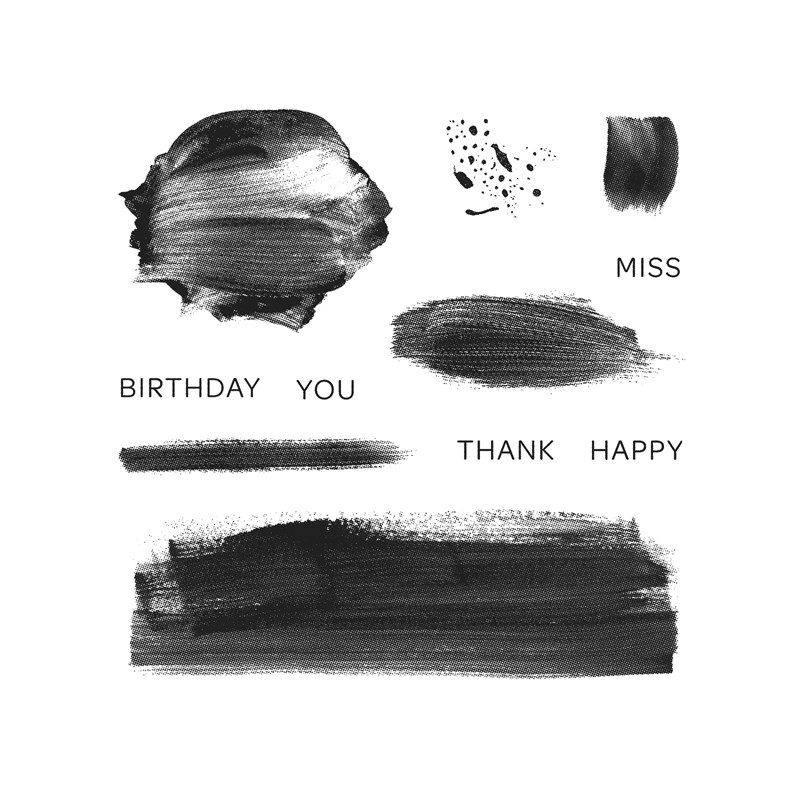 |
| Brush Strokes Stamp Set |
 |
| Layered Butterflies Thin Cut Dies |
If you need a Maker (consultant) I'd be happy to help. If you'd like to BE a Maker I'd love to have you on my team! Have you heard about our new VIP Customer Program? As a member you enjoy perks like a discount on your orders, FREE Stamp of the Month, special product bundles and online events.  Before you go...... be sure to sign up to follow my blog so you don't miss any great ideas! The link is in the column on the right. Now it's your turn to pick your colors and create something to share. We can't wait to see what you make! Michelle #showandtellwithmichelle #ctmh #cardmaking #colordare #colormyheart |


No comments:
Post a Comment
What did you think? Please leave a comment and make my day!