Showing posts with label techniques.. Show all posts

Friday, August 19, 2022

Framed Scene ~ Color Dare #510


Our popular Tic Tac Toe color challenge is up this week! Pick your colors by row, column or diagonal. Then if you want to use any of the other colors in the grid that's fine. Black, White and Neutrals are Free to use. What you can't do is use colors not seen in the grid.

We reference Close To My Heart colors but you can use any brand you have as long as you can make a very close match. Kind of close doesn't count. Did I mention you can't use colors not in the grid? Please be sure if you're combining challenges you are following the rules of each challenge.

When you're ready to join the challenge just click on the link in the post on our home page.

I'm using one of the new stamp sets in our July-Sept. catalog. I love the calmness of this scene. I started with the middle column of colors (Sage, Pine, Shortbread) and added Gold and Sapphire. 

Using a card base from our White Cards & Envelopes Value Pack (this is a great deal!) I got started building my design. I used White Daisy Cardstock and stamped the scene in Pine Exclusive Inks. I added color with a Water Brush using Sage, Shortbread, Pine and Sapphire ink. 

The Gold Glitter Paper adds a nice touch to the layers, and Die Cut flowers. The pattern paper is from our Backyard Bliss Paper Packet. Foam Tape was used to adhere the white layer to the Gold Glitter paper for a good stick.


Color My Heart Color Dare

X7283B Backyard Bliss 
Paper Packet


If you need a Maker (consultant) I'd be happy to help.
If you'd like to BE a Maker I'd love to have you on my team!

Have you heard about our new VIP Customer Program? As a member you enjoy perks like a discount on your orders, FREE Stamp of the Month, special product bundles and online events. 

Before you go...... be sure to sign up to follow my blog so you don't miss any great ideas! The link is in the column on the right.


Michelle

#showandtellwithmichelle #ctmh #colordare #colormyheart #cardmaking #colorchallenge


Wednesday, May 18, 2022

Butterfly card and Gift Box

 I needed a couple of gifts for dear friends that are retiring and only had a short time to come up with an idea. I decided to give them each a box of my handmade cards and made a pretty box to put them in! I love how it turned out and hope they do, too.

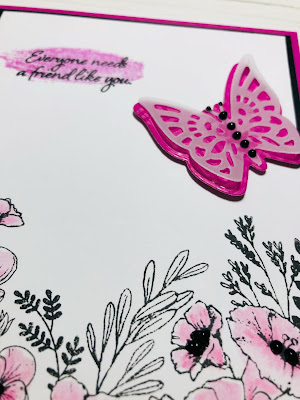
The card was made to go with the colors of the box. I stamped the image in Intense Black Exclusive Inks. I knew I'd be using a water brush and needed a colorfast ink. I colored with Watercolor Pencils and blended with a Water Brush.  

The ink behind the sentiment is 2nd generation Wild Berry. To do this you ink your stamp, stamp it on scrap paper then stamp on your project. 

The butter fly is the smaller one from the Thin Cut dies. Both butterflies have their top layer cut from Vellum. The other layers are from the Wild Berry Blast Paper Packet and Wild Berry Blast Coordinating Cardstock. 

Other products used are a card from our White Cards and Envelopes Value Pack, Cardstock in White Daisy, Black and Wild Berry.


Here you can see a close-up of the butterfly which it popped up a bit on Thin Foam Tape.  The Black Stickles have been added to the butterfly and the flower centers.


For the gift box I used Black Cardstock with Wild Berry details because I love how bold and pretty this combo it. The box's outer dimensions are 4 1/2" x 6" x 1 1/2". To make the box I used a piece of cardstock measuring 7 1/2" x 9". I scored all four sides at 1 1/2". You end up with a scored square in each corner. Cut on ONE score line from the edge to the score line going across. Fold up the sides using the score lines. Fold in the tab formed by the cut. I used some tape adhesive and glue to adhere it. This gave me immediate stick with the tape adhesive with a permanent stick once the glue dried. Now you have the bottom of the box. Do the same to create the top of the box. This box holds 10 cards.

For the belly band I cut a 2" x 12" piece of cardstock. I was a tiny bit short so I cut an insert to finish the length. I placed the butterfly on top of that section and no one knows it's eve there!

The butterfly was cut with dies and then glued together. I added some Stickles to the body to help cover the glue.


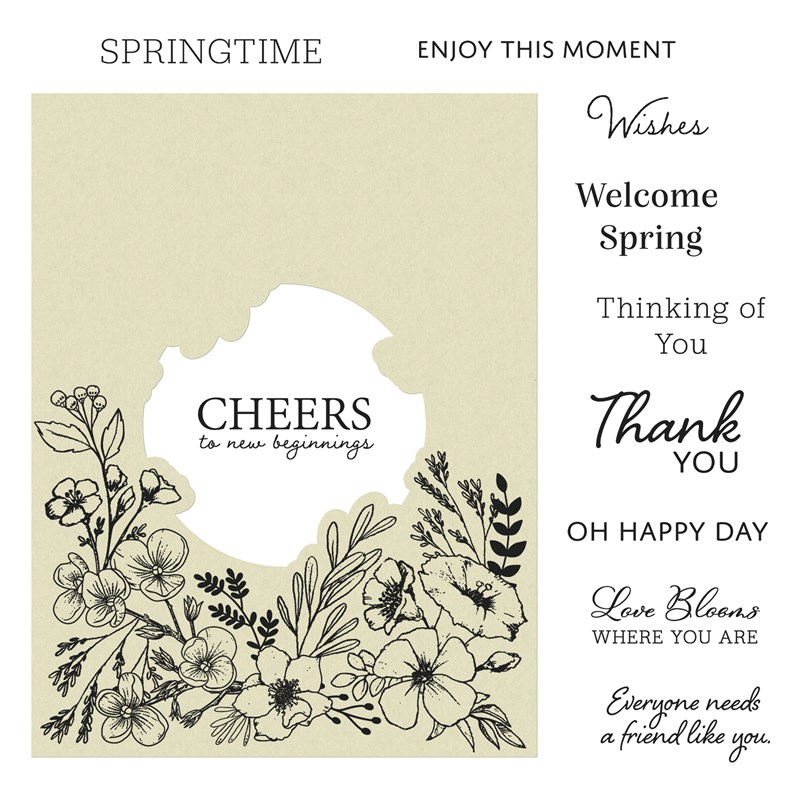
In Full Bloom Stamp Set + Thin Cut Dies
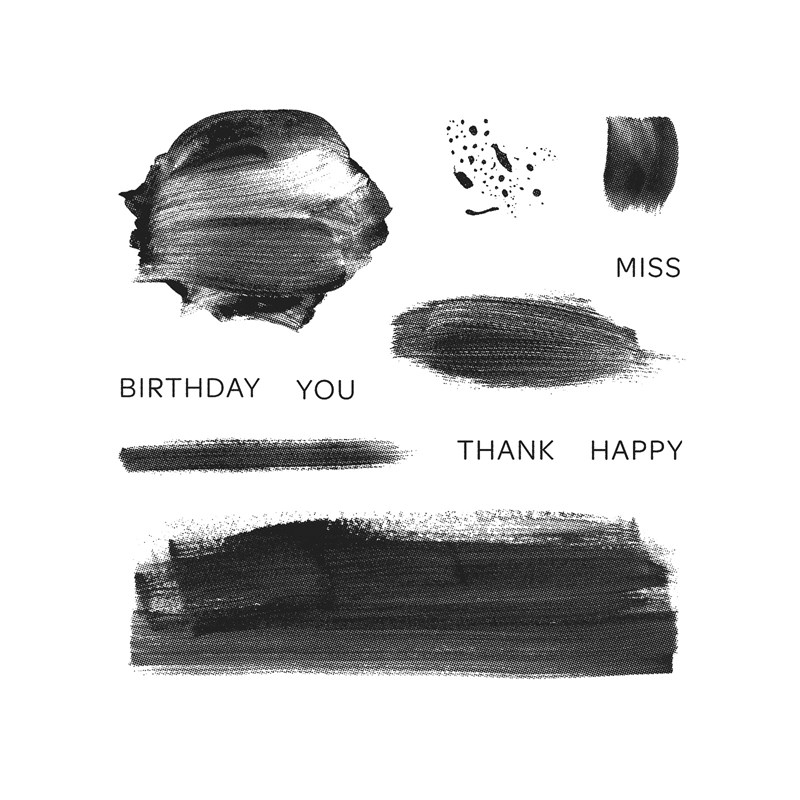
Brush Strokes Stamp Set

Layered Butterflies Thin Cut Dies


If you need a Maker (consultant) I'd be happy to help.
If you'd like to BE a Maker I'd love to have you on my team!

Have you heard about our new VIP Customer Program? As a member you enjoy perks like a discount on your orders, FREE Stamp of the Month, special product bundles and online events. 

Before you go...... be sure to sign up to follow my blog so you don't miss any great ideas! The link is in the column on the right.

Now it's your turn to pick your colors and create something to share. We can't wait to see what you make!


Michelle

#showandtellwithmichelle #ctmh #cardmaking #colordare #colormyheart


Friday, January 28, 2022

I can Color My Embellishments? WOW!!!


Color Match Embellishments by Coloring Them In!

Color Match Embellishments #crafting #embellish #glitter #accent #adhesivebacked #color #diy #markers #wood #acrylic #plastic #cork
You can shop for these supplies here.

When creativity strikes, it can do so in a full spectrum of colors! Our exclusive colors can be found in Exclusive Inks™ stamp pads and re-inkers, shimmer brushes, embellishments, and so much more. With these products, you can achieve effortless color coordination in all of your crafting.

Sometimes, however, the embellishments that we want to use in our artwork are only available in neutral colors, such as white, wood, or cork. The good news is that you can get crafty with your embellishments as well and color them to meet your color needs!

First things first, we absolutely love all of our embellishments and the colors that they come in. We wouldn’t have them any other way, and they serve us so well in lots of art projects, as you have witnessed in the many artwork examples shown on this blog, our catalogs, and our other social media outlets. The idea today is to show you just another amazing facet to these already incredible little embellishments that can make all the difference!

Color Match Embellishments #crafting #embellish #glitter #accent #adhesivebacked #color #diy #markers #wood #acrylic #plastic #cork

(Featured above: Clear Sparkles, Bright Pink Shades TriBlend™ Marker, Dazzle Liquid Pearls™, Hibiscus Stickles™ Glitter Glue, Wild Berry Exclusive Inks™ Stamp Pad, White Pearls, Gold Yellow TriBlend™ Marker, Bisque Liquid Pearls™, Platinum Stickles™ Glitter Glue, Sundance Exclusive Inks™ Stamp Pad, Silver Glitter Gems, Dull Green TriBlend™ Marker, Sage Liquid Pearls™, Cool Mint Stickles™ Glitter Glue, Avocado Exclusive Inks™ Stamp Pad, white dots, Aqua Blue TriBlend™ Marker, Robin’s Egg Liquid Pearls™, Waterfall Stickles™ Glitter Glue, Lagoon Exclusive Inks™ Stamp Pad)

You can shop for these supplies here.

A lot of the color that we’ve added to our example embellishments can be added directly from the tool to the embellishment. For example, markers, shimmer brushes, and glitter glues, all have tips fine enough that can dispense the color right onto your choice of embellishment. When you are coloring with these sorts of tools, we encourage you to color the embellishment before adding it to your project. If it is adhesive-backed, color it while it is still on the backing sheet that it came on. For embellishments that are not adhesive-backed, use a small amount of adhesive on the back and attach it lightly to a piece of scratch paper. This way, you can color the embellishment to just the right color you want without worrying about making stray marks on your project. You can then place the newly colored embellishment after you’ve achieved the color or effect you were hoping for.

Color Match Embellishments #crafting #embellish #glitter #accent #adhesivebacked #color #diy #markers #wood #acrylic #plastic #cork

(Featured above: Wood Arrows, Pink LePen™, Bright Pink Shades TriBlend™ Marker, Watercolor Pencils, waterbrush, Wild Berry Shimmer Brush, Fuchsia Gloss Spray, Hibiscus Stickles™ Glitter Glue, Picked Raspberry Distress Oxide™ Ink Pad, Wild Berry Exclusive Inks™ Stamp Pad, Dazzle Liquid Pearls™)

You can shop for these supplies here.

Porous surfaces, such as wood or cork, will absorb a lot of the colors—gels, glues, and embossing powder are the exceptions—whereas the color media will sit on nonporous surfaces found on embellishments like dots and gems. Regardless of the embellishment you may be garnishing, always remember to allow the color to dry in order to avoid any unwanted transfer (onto yourself or other parts of your project).

Color Match Embellishments #crafting #embellish #glitter #accent #adhesivebacked #color #diy #markers #wood #acrylic #plastic #cork

(Featured above: Sweet as Honey Cork Shapes, White Gel Pens, Embossing Ink Pens, White Super Fine Embossing Powder, Hibiscus Stickles™ Glitter Glue, Wild Berry Shimmer Brush, Bright Pink Shades TriBlend™ Marker, Aqua Blue TriBlend™ Marker, Gold Yellow TriBlend™ Marker)

You can shop for these supplies here.

We will leave you with one final tip. If you are wanting to color match an embellishment with one of our exclusive colors, our Exclusive Inks™ are your answer! Depending on the embellishment, you may want to either use one of our stamp pads or re-inkers. If you are adding color to clear sparkles(see our Wild Berry Exclusive Inks™ example in the first set of embellishments, above), use a spongeor dauber with your ink pad. Ink the sponge, then gently dab the embellishment until the desired color is achieved. For embellishments that may require more detail, a re-inker paired with a waterbrush allows great control and precision. Place a drop of re-inker onto an all-purpose mat (or another nonporous surface that can act as your palette). Lift the ink with the brush to add color to your embellishments in a more controlled manner.

There’s no limit to the creative ways you can add a pop of color to your artwork!

Saturday, February 15, 2020

Color Your World ~ February Technique Blog Hop

Welcome to our Technique Hop! Each 15th of the month we feature a different technique for you to hopefully try out yourself! This month we're featuring ways to color your creations!

The blog ahead of mine belongs to Alyson Mayo. Click on the links in each post to continue along on the hop. You're going to love all the ideas you see! 

I decided to make a card using our very special stamp set called Keep Your Head Up. This set was designed exclusively to help our friends in Australia with the bush fires. 100% of the proceeds will go to this cause through Red Cross Australia. 

I love how this card turned out and  a photo just doesn't do it justice. I stamped in black ink and colored using a variety of our Shimmer Brushes. Most often you'll see the shimmer brushes used to accent different parts of a design but you can also use them to just color the design itself! In the close-up you get a better idea of the colors and maybe a bit of the shimmer. 

The frame was made using the Stitched Square Thin Cut Dies and our Oasis Holographic Paper. This paper is SO cool! Depending on how the light hits it the color shifts and changes. A little bow seemed like a good touch to finish off the whole thing. I left the inside blank so when the card is used a custom message can be added.


Close To My Heart products
  • Stamp Set: Keep Your Head Up
  • White Cards and Envelopes Value Pack
  • Cardstock: White Daisy
  • Specialty Paper: Oasis Holographic
  • Exclusive Inks: Intense Black
  • Thin Cut Dies: Stitched Squares
  • Shimmer Brushes: Clear, Gold, Lagoon, Sapphire, Julep, Wisteria, Raspberry
  • Wisteria Ribbon
If you need a consultant I'd be happy to help.
If you'd like to BE a consultant I'd love to have you on my team!

Now it's time to hop over and see what colorful ideas Haley Dyer is sharing! Enjoy the hop. Thanks for stopping by.

Michelle

#showandtellwithmichelle #ctmh #cardmaking #techniquehop

Dainty Floral Look ~ Color Dare #726 + Special Offer

Are you looking for a new color challenge? You've come to the right place! Each Friday our team at Color Dare shares a new palette of ch...