Showing posts with label card. Show all posts

Thursday, June 18, 2026

Fancy Fun Fold Card

This is such a pretty card and a fun way to say Thank You. The design uses products from our new Scalloped Boutique Suite and they are beautiful! Let's dive in and take a look.

The card starts with a cardstock base that doesn't open. Here are all the measurements:

Card Front

  • Base CS: 4-1/4" x 5-1/2"
  • White CS: 4" x 5-1/4"
  • DSP: 3" x 12"
  • Scallop circles: 3-1/2",  2-3/4", 2"
Inside:
  • CS : 2-1/4" x 4-1/4"
  • CS: 2" x 4"
Extra CS for butterflies.


Glue the two larger CS pieces to form the base. 
SCORE the DSP at 3-1/4", 8-1/2" and 11". 
Fold back the 1" end of the DSP.
Center the DSP between the score marks and glue to the card base.
Glue the die cut circles to each other,
Close the DSP and with the 1" folded back glue the circles to this fold only. *See photo below.
Decorate with stamped and punched butterflies and some gems.


The inside is kept simple with layered CS and a butterfly. Since the gems are flat you can add one to this butterfly, too!


I love the DSP and how you get patterns on both the front and inside of the card! Pick your colors based on your DSP colors. This makes it simple and keeps it all coordinated. 

Why not give this Fun Fold a try? I know I'll be using this design a lot!

Michelle Loncar
Independent Stampin' Up!® Demonstrator 
MichelleLoncar.stampinup.net
Images©Stampin' Up!®

#showandtellwithmichelle #funfoldcards #cardmaking #bloomboutiquesuite #allaflutterbundle

Tuesday, May 19, 2026

Lily of the Valley Card

I just my Lily of the Valley Bundle and couldn't wait to play with it! The flowers are so pretty and have coordinating die cuts making it easy to create lovely florals. There are great messages, too!

In the same order I got the 5 New In Color Shimmer Brushes, too. Who couldn't help but combine the two for a project? Not me! Also, the May Product of the Month: Berry Botanicals Vellum as in the order so why not include that, too! Let's take a look. 

By the way, we now offer a New and Exclusive product each month we call the Product of the Month. This month it's the pack of 12 sheets of Vellum! Other months have bern a full sized die, stamp set, DSP pack. It's always a surprise! It's only $5 with a qualifying purchase of $75. This is a great deal!

The floral Vellum sheets are beautiful but wanted to show off those New In Colors and Lily of the Valley flowers. The perfect way to go was with the green polka dots pattern. 


The colors I wanted to use were the Peaceful Pine, Hydrangea Hue and Barely Blush. I stamped the images in our New Hybrid Black Ink and let it dry a few minutes before coloring, The flowers were colored with theNew Shimmer Brushes and layered on a die cut images from the bundle. Simple, right? The sentiment was stamped and fussy cut then mounted on Mini Stampin' Dimensionals to pop it up. A few of the New In color Dots and the front was done!


Here is a close up showing the pretty shimmer on the flowers. It really does add such a nice look!


The inside of the card is just as simple as the front. A sweet message and another flower. I had a strip of the vellum I added to ground the flower. 

Have you colored with Shimmer Brushes? Wink of Stella is a nice way to add shimmer to something colored with markers. How about trying to use the shimmer brush as your main color option? I think it gives a great look to a project!

Michelle Loncar
Independent Stampin' Up!® Demonstrator 
MichelleLoncar.stampinup.net
Images©Stampin' Up!®

#showandtellwithmichelle #cardmaking #productofthemonth #lilyofthevalleybundle 


Thursday, April 9, 2026

Another Arrow Fold Card

I'm having so much fun making Arrow Fold cards I just had to share another one! This time I used the Fragrant Layers Bundle with the Lovely Blossoms DSP. It created such a pretty look!

These papers are so pretty and really look great in this design. The card base is Cloud Cover card stock as are the die cut flower outlines. The leaves are Old Olive and flower centers are Secret Sea with a gem. 


Here is a template I made for my class. The card base is 5-1/2" x 4-1/4" when folded. I ended up using 2 pieces of the DSP since the designs I wanted were on different sheets. If you use a sheet with a pattern you like on both sides you only need one pies of the DSP (5" x 4"). The white card stock is also 5" x 4".

On the inside of the card base, measure 2-3/4" for the bottom center. Along the sides measure up 2-1/8". Use a pencil so you can erase any marks after scoring/cutting. 

To create the arrow fold on the card base fold the LONG score line to the inside. Fold the SHORT score line to the outside. I used Tear Tape to hold these folds in place. 

The cuts from the DSP and card stock are used to decorate the spaces as seen in my card photos.


Have you created an Arrow Fold card yet? Go ahead and give it a try! It's easier than you think!

Michelle Loncar
Independent Stampin' Up!® Demonstrator 
Images© Stampin' Up!®

#showandtellwithmichelle #fragrantlayersbundle #lovelyblossomsdsp #cardmaking #arrowfoldcard

Wednesday, April 8, 2026

What's Up Wednesday ~ Pretty Vellum Look

What's up this Wednesday is a pretty card using Vellum as a panel for a soft look. The Vellum is translucent rather than see-through and creates a pretty and soft look in your design. This card was inspired by Lisa Stenz with a few of my own twists. 

I started with a 4.5" x 5.5" top fold card base in white. I wanted a clean and crisp look to counter the pastel pink. I cute 1" off the bottom front, then cut another 2.25" off. I saved the 1" piece for attaching later. The 2.25" piece was used for die cutting the flowers.

Using the Fragrant Layers Bundle (stamps & dies) I die cut the flower outline and trimmed off the ends. The tip and bottom border were glued to the 3" x 4.25" piece of Vellum then to the card base and 1" piece. A piece of pink card stock was glued to the back of the card front to make a nice smooth and finished look.


For the die cut flower accent, A sponge dauber was used to apply ink to the center. A few die cut leaves and a gem for the center finished the flower. Some random stamping softens the white space at the top of the card, white a sentiment did the same for the bottom.


Inside, the card is simple. Just a stamped flower in the lower right corner was all that's needed. I didn't add a sentiment yet. I'll do that so I can personalize it when I'm going to use it. 

This is such a pretty look and can be adapted to any color combo you like! Why not give it a try?

Michelle Loncar
Independent Stampin' Up® Demonstrator 
Images© Stampin' Up!®

#showandtellwithmichelle #fragrantlayersbundle #vellumcard #cardmaking


Saturday, August 10, 2024

Heartfelt Punch Background Card

Here's a great idea! Use a shaped punch to create a fun background. I punched out 3 paper patterns then glued them to a piece of cardstock. I used white but you could use any color that goes with your paper. Trim the overhang from the edges and layer on a card. it's that easy!!!

I kept the sentiment simple by stamping in black ink on white cardstock. To dress it up a bit I wrapped some jute time around one end, popped it up with foam and added a couple sparkles 

See below for a lit of products.


Heartfelt Hexagon Punch

Iconic Celebration DSP
A great variety of for all occasions!

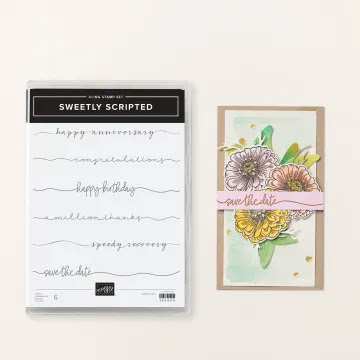
Sweetly Scripted Stamp Set


2023-2025 In Color Jute Trim


2023-2025 In Color Opaque Sparkle Dots

Just a few more basic items:

It's really easy to create a background like this. Give it a try!


Michelle Loncar

Independent Stampin' Up Demonstrator 


#showandtellwithmichelle #cardmaking 

Tuesday, May 18, 2021

May/June New Product Blog Hop

Welcome to our May/June  New Product Blog Hop. We're the group that brings you the Stamp of the Month blog Hop. Join us on this hop to see ideas using new products from our new current catalog!

The blog before mine belongs to Alyson Mayo. Click the link in each post to hop to the next blog on the hop. Easy, right! You're going to see so many great ideas from these talented Makers, so sit back, relax and enjoy the ride!

Click here for a list of participants.

My card is an inspiration from Brandi Bergh. She made her card in blue and it was so pretty I could wait to make it in this Sangria color! 

This is an easy card to make. The layers are built up on the front of the card base. Pattern paper from our Special called You are Enough. Next is cardstock then the white layer. Other than the white cardstock the Sangria color is what you see. Sometimes it looks really nice to go monochromatic and let the details in the image shine! 

The butterfly was cut using our new Butterfly Thin Cuts. I used the Coordinating cardstock to the You are Enough paper for the base and Sangria cardstock for the top layer. The sentiment comes from the gorgeous May Stamp of the Month called Flowers for You. I think I've used some part of this stamp set on every project I've made this month! You really NEED Flowers for You!!! It's only available until May 31st so don't wait....get it now!

After adding the sentiment a couple of sequins finished the look! Remember to add embellisments in groups of odd numbers. Your eyes look at that as a balance.  Hint: If you do an even number your eyes keep searching for more. So if you feel your eyes roaming over your project count your embellishments to see if you have that odd number! 


Floral Borders & Sentiments

Flower for You
May Stamp of the Month
Only available May 1 - 31, 2021

You Are Enough Paper Bundle


Other Close To My Heart products used on this card.
  • White Cards and Envelopes Value Pack
  • Cardstock: White Daisy, Sangria
  • Exclusive Inks: Sangria
  • Rose Gold Sequins
  • Tools:  Tombow Liquid Glue, Thin 3D Foam Tape (under the butterfly)
If you need a Maker (consultant) I'd be happy to help.
If you'd like to BE a Maker I'd love to have you on my team!

Have you heard about our new VIP Customer Program? As a member you enjoy perks like a discount on your orders, FREE Stamp of the Month, special product bundles and online events. 

Before you go...... be sure to sign up to follow my blog so you don't miss any great ideas! The link is in the column on the right.

Now it's time to hop over and see what Darlys Recker has to share with us.


Michelle

#showandtellwithmichelle #ctmh #newproductbloghop #cardmaking

Thursday, October 1, 2020

With All My Love ~ October Stamp of the Month Blog Hop

 October 1st brings us a new Stamp of the Month called With All My Love. It's a beautifully detailed set with SO many options in sentiments. Our talented group of consultants will show you many ways to use this wonderful stamp set!  The blog before mine belongs to Darlys Recker.  Just click the links in each post to go to the next blog on the hop.

I wanted to show how easy it can be to add color without having to color in all the details of the image. It's really quite easy and gives a fun look to the project. I started with our new Distress Oxide inks and the Mini Blending Tool. The tool makes the ink go on smoothly and blend effortlessly! Once that step was done I spritzed it with some water to create a look of texture. After letting the piece dry I stamped the large heart in black ink. Doesn't that look nice as a silhouette on the inked background!

Another detail I added was to use a Thin Cut Die along the bottom of the inked layer. It gives such a beautiful flow across the card front! I put a Bitty Sparkle in the center of the larger flowers to finish it off.


Close To My Heart products used for this card.

  • Stamp Set: With All My Love (available Oct. 1-31, 2020)
  • White Cards and Envelopes Value Pack
  • Cardstock: White Daisy, Black
  • Exclusive Inks: Black
  • Distress Oxide Inks: Mowed Lawn, Peacock Feathers, Picked Raspberry
  • Mini Ink Blending Tool
  • Thin Cut Dies: Fancy Borders
  • Bitty Sparkles
If you need a consultant I'd be happy to help.
If you'd like to BE a consultant I'd love to have you on my team.

Before you go....... be sure to sign up to follow my blog so you don't miss any great ideas! The link is in the left column. You can also follow me on Pinterest and Facebook using the Tabs in the Header.

Now it's time to hop over to see what the talented Gina Brandstetter has created to share with us! Thanks for stopping by. 

Michelle


#showandtellwithmichelle #ctmh #stampofthemonthbloghop #cardmaking

Tuesday, September 1, 2020

September Stamp of the Month Blog Hop ~ Here for the Memories

Welome to our Stamp of the Month Blog Hop! Each month Close To My Heart has a special stamp set featured for the month. This month Here for the Memories seems to favor scrapbooking but I'm going to show you a cute idea using this set on a card!

The hop is one big circle so just keep clicking on the links to go from blog to blog! The blog before mind belongs to Megan Lawrence. 

As I said I have an idea for using this set on a card. I used layers of pattern paper from the Party Time paper pack. I love the bright colors and festive feel it gives the card. 


Only available from September 1-30, 2020

Other products used to make this card.
  • Stamp Sets: This Right Here, Say It in Style
  • White Cards and Envelopes Value Pack
  • Paper Pack: Party Time
  • Cardstock: White Daisy, Green Apple
  • Exclusive Inks: Sapphire, Raspberry, Green Apple
  • Black & White Dots
If you need a consultant I'd be happy to help.
If you'd like to BE a consultant I'd love to have you on my team!

Before you go....... be sure to sign up to follow my blog so you don't miss any great ideas! You can also find me on Pinterest or Facebook by clicking on the Tabs in the header.

Now it's time to hop over and see what Brandi Robinson has created to share with us. I know you'll love it!

Michelle

#showandtellwithmichelle #stampofthemonth #ctmh #cardmaking

Friday, September 21, 2018

Just Treats Card ~ Color Dare 311


How do you like the colors of this challenge? The Design Team at Color My Heart hopes you will join in the fun and create any paper craft using the colors of this challenge and share it on our home page. Tell your friends to join the fun, too!

I'm also sharing this card on the Heart 2 Heart Challenge Blog for their Sweet Treats challenge. Check it out!

Color My Heart Color Dare was started in 2011 by Sarah Stone. Sarah is no longer part of the Design Team but still participates with the challenges. I discovered Color Dare in 2012 when I was searching for a challenge to try out. I really liked the idea of being challenged by using certain colors. That made part of the decision making process of creating a paper craft easy! When a Design Team Call went out later that year I applied and was selected to join the team! It's been fun working with a variety of team members over the years and recently I became the moderator of our team. We have a fantastic team and I love working and creating with these gals. Would you like to join us? We're very supportive and a fun group. If you would like to be considered for our team contact me at: stamplady@kc.rr.com.

I love the Ballerina and Peacock but adding Saffron was a challenge for me. So I dove into my Make It from Your Heart How-to book for inspiration and came up with this card.....and I love it!

Ok a bit of honestly here. The banner on the right with the heart.....that's an add-on to the design because I made a tiny bit of an ink smear on the card front. *sigh. Either I started the card all over again or I needed to cover it up. The banner and heart was my solution.

Notice the shine on the candy? I put some Liquid Glass on the candy to make it look like cellophane wrappers! The color on the candy is 1st generation on the Ballerina but 2nd generation on the Peacock and Saffron. I also swiped some gold shimmer across the word friends to make it stand out a bit. the letters in Thankful were colored with a touch of ink from the lid of the stamp pad and a water brush.

The stamped images are from the Just Treats set. This is our September Stamp of the Month and will only be available until the end of this month!


Detail of candy

Inside of card


Click here to see the blog hop for this set!

Close To My Heart products:
  • Stamp Set: Just Treats (available until Sept. 30, 2018)
  • White Cards and Envelopes Value Pack
  • Boutique Paper Pack and Compliments
  • Make It from Your Heart How-to Book Volume 4, Pattern 22.
  • Exclusive Inks: Charcoal, Peacock, Ballerina, Saffron
  • Cardstock: White Daisy
  • Specialty Paper: Gold Glitter Paper
  • Embellishment: Gold Glitter Gems, Gold Shimmer Brush, White and Gold Ribbon
  • Tools: Liquid Glass, thin 3D Foam Tape, Water Brush, Journal Pen

Let's go shopping!
If you need a consultant I'd be happy to help.
If you would like to BE a consultant I can help with that, too.

Are you feeling inspired to play along? We reference Close To My Heart colors but you can use any brand that's a close match. You must use the 3 colors above but black, white and neutrals like grey and browns are free. Full details are on our home page.

Have a craft happy day!
Michelle

#colordare #colormyheart #ctmh #showandtellwithmichelle #cardmaking
SaveSave

Monday, October 9, 2017

Joyful Stars Blog Hop


Welcome to our monthly Joyful Stars Blog Hop! If yo've come from the blog of
Debi Brille you're on the right path. Just keep clicking on the link in each post to hop to the next blog! Easy Peasy, right!

As you can see I've started my Christmas Cards for this season! This card was made with two stamp sets that are what we call "M" size and only cost $2.95 each! I used Archival Black ink because I didn't want the image to bleed when I colored with markers. A touch of our clear Shimmer Brush on Santa's hat gave a frosty feel to the card!


All products are Close To My Heart:
  • Stamp Sets: Little Saint Nick, Ho Ho Ho, Frosted Christmas
  • White Cards and Envelopes Value Pack
  • Cardstock: White Daisy, Pomegranate, Pixie
  • Exclusive Inks: Archival Black, Pomegranate
  • ShinHan Markers: Cherry Pink, Tender Pink, Colorless Blender
  • Embellishments: Silver Shimmer Trim, White Shimmer Trim, Clear Shimmer Brush
  • Thin 3D Foam Tape
If you need a consultant I'd be happy to help.
If you'd like to BE a consultant I can help with that, too!

Are you ready for some more inspiration? It's time to head over to see what
Andrea Sherman has created to share with us. 

Have fun hopping!
Michelle

#bloghops #cardmaking #closetomyheart #christmascards

Friday, August 31, 2012

September Stamp of the Month Blog Hop


Welcome to our September Stamp of the Month Blog Hop! If you came from Judy Burger's blog you're on the right track. The Hop makes one big loop, so just keep clicking on the link at the end of each post and you'll get to see tons of ideas for this stamp set!

For September our stamp set is called Fall Favorites. It's a set of 11 great stamps for fall projects. Here I've made a card using our new Cricut Artiste cartridge. I cut it for a 4"x4" card. The wrapper for the card was also cut from the Artiste cartridge. The Background paper is from the Dakota paper pack. I love the Slate and Barn Red houndstooth pattern. So versatile! A few dots of our new Almond Glitz Glitter Gel accent both the pumpkins and around the circle layer.


Here's a look at the entire set:


Isn't it adorable! It's only available Sept. 1-30, 2012 so don't miss out! You can even get it for as little as only $5.00 with a qualifying order! Also, during the month of Sept. you can get a double stamp set called It's Your Day for only $5.00 with a qualifying purchase! Wow! You can really get some great deals in September! Click here to check it out!

Now it's time to hop on over to see what Sarita Schraeder has to show us on her blog! 

Happy Hopping!
Michelle


Friday, April 27, 2012

Stella--Workshop on the Go Kit

Have you tried our Workshop on the Go kits yet? They are a fantastic way to create! In each Idea Book there are new workshop kits introduced with the 8 newest paper packs!

This is a card I made using the bonus project from the kit. It's a 3 1/2" x 8" Die Cut card (Z1738). I love these new Die Cut cards! You get a pack of 10 cards AND envelopes! The unique way the card opens and the fancy edge really kicks it up a notch!


Here is what you get in the Stella workshop kit (G1032):
1-complete My Reflections Paper Packet (X7147B)
1-My Acrylix C-size stamp set (exclusive to the kit)
2-Colonial White cardstock sheets
1-Bohemian Assortment (embellishment pack)(Z1687)
1-Dimensional Elements--Hearts (Z1735)
1-Instrutctional Brochure

All for only $29.95! Did you catch the part about the stamp set being exclusive to the Workshop on the Go kit? That's right it only comes as part of the workshop kit.

The Instructional Brochure helps you create your choice of projects! You can create two beautiful 2-page layouts; then use the remaining supplies along with a few additional items to make the bonus project! OR you can use the supplies to make whatever you like! Either way you can get a lot of bang for the buck out of just one Workshop on the Go kit!

Click here to see the full selection of current Workshop on the Go kits!

While you're there don't forget to check the "While Supplies Last" section for some really, REALLY great deals! Sale items start as low as $1.00!

Michelle

What's Up Wednesday ~ Join & Get Rewarded!

We have a special offer when you join the Stampin' Up!® Family in October! Join by October 31, 2026 to get in on the extra perks!  I sta...