Showing posts with label Technique Blog Hop. Show all posts

Friday, April 15, 2022

Layered Flowers — April Technique Blog Hop

Welcome to our April Technique Blog Hop! Each 15th of the month our group of talented Close To My Heat Makers feature a different technique and give you all kinds of idea how to use it! 

All you have to do is click the link in each post to hop to the next blog. For reference, the blog before mine belongs to: Brandi Robinson's. 

My card was inspired by Shirley Ross. She came up with such a great idea that would also fit this hop and I couldn't wait to put my spin on it! 

I stated with the solid flower die from the Layered Flower Thin Cuts set (see below). With our two toned cardstock you automatically get the light and dark side of the color making it easy to get shadows.

The background of the card was made with Avocado Cardstock and Wood Grain paper. The square is from our Oasis Holographic paper and and cut with our Stitched Square Thin Cut dies. The entire flower head was also popped up with some Thin Foam Tape.


This photo shows the dark side of the Lemonade cardstock. I folded over the top 3 petals and added some Thin Foam Tape. The tape helps give some dimension to the overall look of the flower. Those 3 petals were also curled up a bit at the ends.


Here you can see I've added some details to the flower. On the 3 fold over petals you can see the lighter side of the cardstock. With a journal pen I did some doodles to accent the petals. The flower center is accented with a white gel pen. I also added the doodles around the outside of the card. I cut two pieces of the leaves: one dark and one light then doubled up the two lower leaves.


Z4324 Layered Flowers Thin Cuts


D2077 Succa for You

Now it's time to hop to the next blog belonging to: Michelle John's.


If you need a Maker (consultant) I'd be happy to help.
If you'd like to BE a Maker I'd love to have you on my team!

Have you heard about our new VIP Customer Program? As a member you enjoy perks like a discount on your orders, FREE Stamp of the Month, special product bundles and online events. 

Before you go...... be sure to sign up to follow my blog so you don't miss any great ideas! The link is in the column on the right.

Now it's your turn to pick your colors and create something to share. We can't wait to see what you make!


Michelle

Tuesday, February 15, 2022

Stunning Stencils Technique Blog Hop

 Welcome to our February Technique Blog Hop! This month we're featuring stencils and various ways of using them. Sit back, relax and enjoy learning all about stencils!

The hop is one big circle. All you have to do is click the link in each post to hop to the next blog. For reference, the blog before mine is Terry Metzger. 

I decided to use my stencil with texture paste to create a bold and stunning look for my card. I started with black cardstock, the stencil, paste and a palette knife. I wanted an all over design so I cut the cardstock 1/2" smaller than the card front. I spread the Opaque Matte Texture Paste over the stencil making sure to get all the flowers filled in. Next was the drying time. 

Once dry I got busy with my Shimmer Brushes to color the flowers that are now a slightly raised image. Because the paste isn't alway smooth you might get some areas that don't cover easily. I leave that as a rustic look in the design. 


Look how bold and beautiful the colors look against the black background! The Shimmer Brush colors I used are: Capri, Papaya, Wild Berry, Shortbread, Wisteria and Rosemary. It's hard to see in the photo but the whole thing just shimmers! 


In this close-up you can see the shimmer a bit better. I also stamped the dragonfly for an accent. I stamped on white cardstock and on Vellum. I used Intense Black ink so it wouldn't bleed when I colored the images. The other color is Wild Berry ink. I colored with TriBlend Markers (Blue Turquoise Blend, Bright Pink Shades) on the white cardstock and on the underside of the Vellum. After fussy cutting I glued the Vellum to the cardstock dragonfly only on the body. I used Thin 3D Foam Tape to pop up the wings. I also curled the Vellum wings a bit with my pen. 


The inside of the card was stamped with a simple sentiment and accented with a colorful puddle looking image in 2nd generation ink. That's when you ink the stamp, stamp on scrap paper then stamp on your card without inking again. It helps make the inside fun, too.


D2052 For All Occasions


D2051 Perfectly Imperfect Patterns

If you need a Maker (consultant) I'd be happy to help.
If you'd like to BE a Maker I'd love to have you on my team!

Have you heard about our new VIP Customer Program? As a member you enjoy perks like a discount on your orders, FREE Stamp of the Month, special product bundles and online events. 

Before you go...... be sure to sign up to follow my blog so you don't miss any great ideas! The link is in the column on the right.

Now it's time to hop to the next blog and see more great ideas with Cat Nowak. Thanks for hopping by!


Michelle

#showandtellwithmichelle #ctmh #cardmaking #techniquebloghop

Saturday, January 15, 2022

Technique Hop ~ Let's Get Geometrical

 Welcome to our first Technique Blog Hop of 2022! This month we're sharing a geometric theme and ways to use them in your paper crafting. The blog before mine is Brandi  Robinson. Just click on the links in each post to hop to the next blog. 

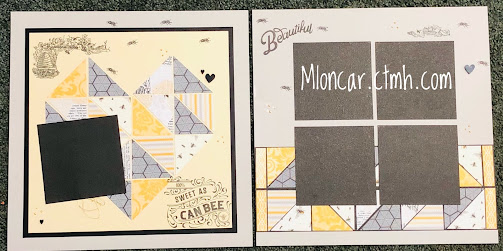
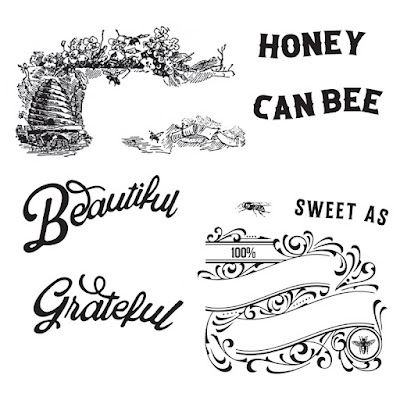
My layout is inspired by one done by Tonya Sheridan. I love this heart shape made from triangles of pattern paper! I stamped images around the pages and accented with some Liquid Pearl dots and tiny hearts. By the way.... our new Wood and Acrylic Shapes are thinner than they used to be! They are so much more user friendly on projects in this new thinner dimension!


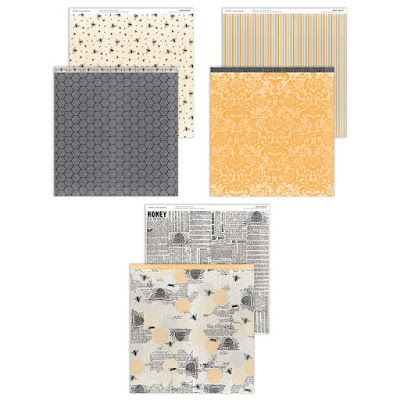
I cut the paper into 2" squares then cut on the diagonal. To create the heart I started at the bottom placing the first two triangles 1/2" up from the edge and at the middle point of that layer. Here are the layer sizes: 12" base is Mink CS, Black CS is 10 1/2" and the yellow CS is 10". After you get the first two bottom triangles placed the heart comes together pretty easy! Just follow the pattern you see in the photo.


The right page also uses the triangle idea but in a different way. It's a border created on a piece of black CS that is 4 1/4" x 12". The narrow pieces at the ends come from the Zip Border on the pattern paper. 


Other Close To My Heart products used on this layout.
  • Cardstock: Mink, Black, Shortbread
  • Exclusive Inks: Black
  • Embellishments: Bisque Pearls, Gold Thread

If you need a Maker (consultant) I'd be happy to help.
If you'd like to BE a Maker I'd love to have you on my team!

Have you heard about our new VIP Customer Program? As a member you enjoy perks like a discount on your orders, FREE Stamp of the Month, special product bundles and online events. 

Before you go...... be sure to sign up to follow my blog so you don't miss any great ideas! The link is in the column on the right.

Now it's time to hop to the next blog. It belongs to Cat Nowak.


Michelle

#showandtellwithmichelle #ctmh #scrapbooking #techniquebloghop #layouts

Wednesday, December 15, 2021

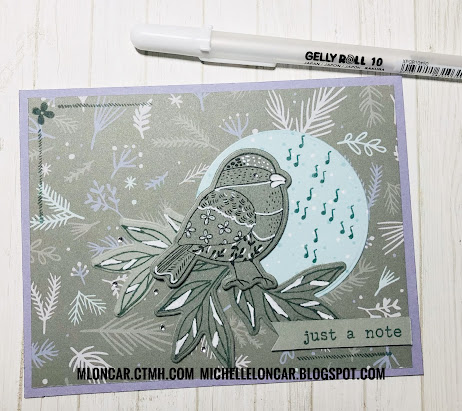
Chickadee Card ~ December Technique Blog Hop

Welcome to our monthly Technique Blog Hop for December.  This month we are featuring Accents of White.... using a White Gel Pen to add accents to our projects! 

The blog in front of mine belongs to Darlys Recker. Simply click the links in each post to hop to the next blog. How's that for easy!!!

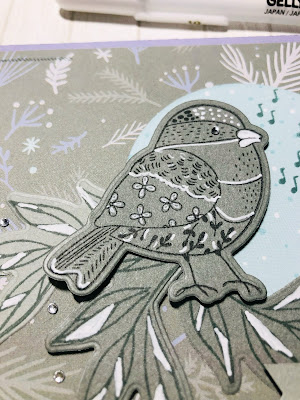
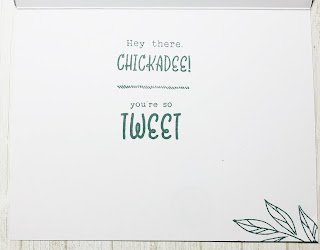
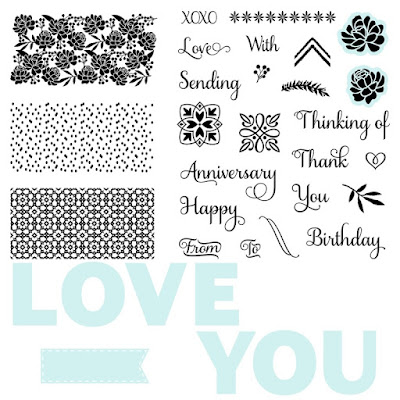
For my card I decided to use a new stamp set I just got. I also love the paper from the Wonderland paper pack and it came together from there. I stamped the bird on Rosemary cardstock with black ink. I added accents with the White Gel Pen to the bird and leaves. The card design comes from one of our How-to Books called Make It from Your Heart. It shows you a cutting guide and samples. So easy!


G1244 Candid Moments Cardmaking Kit

X7274B Wonderland Paper Pack

Z3943 Circles Thin Cuts Dies

Other Close To My Heart products used for this card.
  • How-to Book: Make It from Your Heart, Vol. 5, Pattern 22
  • White Cards and Envelopes Value Pack (this is a great deal)
  • Cardstock: Rosemary, Wisteria
  • Exclusive Inks: Black, Rosemary
  • Embellishments: Bitty Sparkles
  • Tools: White Gel Pen, Thin 3D Foam Tape
If you need a Maker (consultant) I'd be happy to help.
If you'd like to BE a Maker I'd love to have you on my team!

Have you heard about our new VIP Customer Program? As a member you enjoy perks like a discount on your orders, FREE Stamp of the Month, special product bundles and online events. 

Before you go...... be sure to sign up to follow my blog so you don't miss any great ideas! The link is in the column on the right.

Now it's time to hop over to see what Kim Loewen has created to share with us.


Michelle

#showandtellwithmichelle #ctmh #cardmaking #techniquebloghop

Sunday, August 15, 2021

Anything Goes - August Technique Blog Hop

 Welcome to our monthly Technique Blog Hop! On the 15th of the month our talented group of Makers showcase a different technique. This month it's Anything Goes so you are going to see all kinds of techniques on this hop!

The blog before mine belongs to Jayma Malme. It's one big circle so just click the link in each post to go to the next blog. Sit back and get ready to be WOW'd!

For my technique I decided to do some background stenciling on a slimline card. I love these flowers but just didn't feel like all that coloring. Instead I added color by stenciling. It's not a lot of color but just enough to feel like the flowers have some color. I cut the stencil with my Cricut using one of the overlay pattern. The ink was sponged onto the cardstock with a random sort of pattern for the ink. 

I also used the masking technique on the flowers. I stamped the flowers on scrap paper then cut them out. Laying the mask on top of the stamped flower allows you to stamp another flower so it looks like it's partially behind the masked flower. 

Adding some touches of sparkle with glitter paper really stepped up the look! I love a card with sparkle!


Isabella - Scrapbooking Stamp Set + Thin Cuts

Isabella - Cardmaking Stamp Set + Thin Cuts

Other Close To My Heart products used on this card.
  • Slimline Cards and Envelopes Pack
  • Cardstock: White Daisy, Black, Desert Rose
  • Exclusive Inks: Black, Desert Rose
  • Specialty Paper: Desert Rose
  • Cricut
  • Sparkles: Clear, Bitty
  • Thin 3D Foam Tape
If you need a Maker (consultant) I'd be happy to help.
If you'd like to BE a Maker I'd love to have you on my team!

Have you heard about our new VIP Customer Program? As a member you enjoy perks like a discount on your orders, FREE Stamp of the Month, special product bundles and online events. 

Before you go...... be sure to sign up to follow my blog so you don't miss any great ideas! The link is in the column on the right.

Now it's time to hop over to see the goodies Melissa Robinson has to share with us.

Michelle

#showandtellwithmichelle #ctmh #cardmaking #techniquebloghop

Thursday, July 15, 2021

Interactive Elements - July Technique Blog Hop

 Welcome to our Technique Blog Hop! Each month we feature a technique and this month its Interactive Elements! Since this is a hop all you have to do is click the link in each post to continue to the next blog. The blog before mine is Melissa Robinson. Sit back and get ready for our talented Close To My Heart Makers to WOW you with their creative ideas!

I decided to make a card using our Waterfall Thin Cut dies. This Interactive Element design reveals cute little images/sentiments as you slide the element. You can create this so it slides to the right OR pulls down. Either way it's a lot of fun and happiness for the person that receives it!

Here is the finished card. As you pull on the ribbon you will reveal the images stacked on top of each other.


Here you see the pieces cut from the Thin Cut dies.  I stamped and colored the images for the squares then used one of the Thin Cut dies to cut them out along with the other pieces. Note: I didn't end up using the strip of wood paper. The images are colored in with a variety of markers.

This is the long "T" piece  seen in the above photo. You fold it on the score lines alternating back and forth. Then you fold the long piece back and wrap the two small tabs the back and glue them to each other. Now the entire piece should slide when you pull on the end.
   

Working from the last image forward you place the squares. The final square in glued to the last space on the slider. You can see where I placed the adhesive to the left for the next square.

Only glue the left edge of this square to the small area of the folded slider. You can see the adhesive to the left for the next square. 
   
Here you can see I have placed all 4 of the squares on the slider. 

This is one of my favorite techniques when there are glasses involved! I take some Liquid Glass adhesive and fill in the area of the lenses. Once dry it's clear and looks shiny just like the lenses on sunglasses! It works on sunglasses or even regular glasses and adds a great touch to your artwork!
   
This is the inside of the card.
Below is a short video showing you how the slider part works.


Waterfall Thin Cut Dies

Chillin' with My Gnomies

Other Close To My Heart products used for this card.
  • White Cards and Envelopes Value Pack
  • Paper Pack: Wood Grain
  • Cardstock: White Daisy, Black
  • Exclusive Inks: Intense Black, Sangria, Sapphire
  • TriBlend Markers
  • Embellishments: Wood Hearts, Gold Glitter Gems
  • Tools: Liquid Glass, Tombow Tape Adhesive

If you need a Maker (consultant) I'd be happy to help.
If you'd like to BE a Maker I'd love to have you on my team!

Have you heard about our new VIP Customer Program? As a member you enjoy perks like a discount on your orders, FREE Stamp of the Month, special product bundles and online events. 

Before you go...... be sure to sign up to follow my blog so you don't miss any great ideas! The link is in the column on the right.

Next stop on the hop is Cat Nowak. Have fun and off you go! Thanks for stopping by!

Michelle 

#showandtellwithmichelle #techniquebloghop #ctmh #cardmaking

Stampin' Up!'s 12 Days of Creativity Advent Calendar

Let the countdown begin with Stampin’ Up!’s 12 Days of Creativity Advent Calendar, a festive favorite that you and your customers will want ...