Showing posts with label 3D items. Show all posts

Tuesday, February 15, 2022

Stunning Stencils Technique Blog Hop

 Welcome to our February Technique Blog Hop! This month we're featuring stencils and various ways of using them. Sit back, relax and enjoy learning all about stencils!

The hop is one big circle. All you have to do is click the link in each post to hop to the next blog. For reference, the blog before mine is Terry Metzger. 

I decided to use my stencil with texture paste to create a bold and stunning look for my card. I started with black cardstock, the stencil, paste and a palette knife. I wanted an all over design so I cut the cardstock 1/2" smaller than the card front. I spread the Opaque Matte Texture Paste over the stencil making sure to get all the flowers filled in. Next was the drying time. 

Once dry I got busy with my Shimmer Brushes to color the flowers that are now a slightly raised image. Because the paste isn't alway smooth you might get some areas that don't cover easily. I leave that as a rustic look in the design. 


Look how bold and beautiful the colors look against the black background! The Shimmer Brush colors I used are: Capri, Papaya, Wild Berry, Shortbread, Wisteria and Rosemary. It's hard to see in the photo but the whole thing just shimmers! 


In this close-up you can see the shimmer a bit better. I also stamped the dragonfly for an accent. I stamped on white cardstock and on Vellum. I used Intense Black ink so it wouldn't bleed when I colored the images. The other color is Wild Berry ink. I colored with TriBlend Markers (Blue Turquoise Blend, Bright Pink Shades) on the white cardstock and on the underside of the Vellum. After fussy cutting I glued the Vellum to the cardstock dragonfly only on the body. I used Thin 3D Foam Tape to pop up the wings. I also curled the Vellum wings a bit with my pen. 


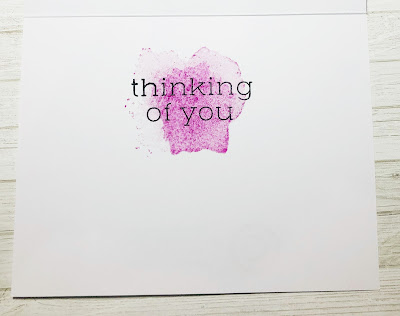
The inside of the card was stamped with a simple sentiment and accented with a colorful puddle looking image in 2nd generation ink. That's when you ink the stamp, stamp on scrap paper then stamp on your card without inking again. It helps make the inside fun, too.


D2052 For All Occasions


D2051 Perfectly Imperfect Patterns

If you need a Maker (consultant) I'd be happy to help.
If you'd like to BE a Maker I'd love to have you on my team!

Have you heard about our new VIP Customer Program? As a member you enjoy perks like a discount on your orders, FREE Stamp of the Month, special product bundles and online events. 

Before you go...... be sure to sign up to follow my blog so you don't miss any great ideas! The link is in the column on the right.

Now it's time to hop to the next blog and see more great ideas with Cat Nowak. Thanks for hopping by!


Michelle

#showandtellwithmichelle #ctmh #cardmaking #techniquebloghop

Thursday, November 9, 2017

Joyful Stars Blog Hop


It's time for a new Joyful Start blog hop! Come along for the ride and see what we've 
made to inspire you! If you've come here from Debi Brile's blog you're on the right path. Just click the link in each post to hop to the next blog!

I've been putting my Cricut machine to work lately! This is a project I made using the Flower Market cartridge. This is a 12" x 12" canvas used as the base for this holiday home decor piece. I just picked out the images I wanted and got busy cutting!


All products are Close To My Heart:
  • Cricut Flower Market cartridge
  • Cardstock: Fern, New England Ivy, Nutmeg
  • Specialty Paper: Kraft Cardstock, Red Glitter Paper
  • Red Enamel Gems (retired)
Other Product:
  • 12" x 12" x 1" Artist Canvas
If you need a consultant I'd be happy to help.
If you'd like to BE a consultant I can help with that, too.

Now it's time to hop over and see what Andrea Sherman has to share.

Happy Hopping!
Michelle

#bloghops #Closetomyheart #homedecor Cricutflowermarket

Monday, May 15, 2017

May ~ Live Beautifully


How about another idea using the Live Beautifully papers? This time I decided to go in a totally masculine direction with my project. Yes you CAN make a masculine project with the Live Beautifully papers! Take a look!

What do you think? Pretty cool, eh! I had a Pennant Frame (retired) and made it up for one of my grandson's photos. Look what you can do when you use the papers without flowers! I used our Chalk Marker to make the road lines on the black and white stripe paper and that set the tone for the rest of the project! Take another look at the papers and see what you think. I bet you find even more uses for the projects floating in your head. 


All products are Close To My Heart:
  • Pennant Frame (retired)
  • Racer Birthday stamp set
  • Live Beautifully paper pack
  • Exclusive Inks: Black, Sea Glass
  • Embellishments: Chalk Marker, Black & White Dots, Thin 3D Foam Tape
If you need a consultant I'd be happy to help.
If you'd like to BE a consultant I can help with that, too!

Are you inspired to create something and share? You don't have to have the papers to participate but you do need to use the colors seen in the paper. Details are in the post on our home page.

Have a great day!
Michelle

#colordare  #colormyheart  #closetomyheart  #Livebeautifully


Thursday, January 15, 2015

January 2015 Technique Hop -- Charmed I'm Sure

Our technique this month focuses on page 133 from our current Expressions Book. In this hop we want to share ideas on how to use our Base and Bling in other ways than jewelry.

I'm also entering this post in the Color My Heart Color Dare for this week: Bamboo, Black and Champagne.

If you've come from Sheila Bennett's blog you're on the right track. Just keep clicking the link and you'll continue on the hop and see some really great ideas!

For my project I made a small purse from the Cricut Artiste cartridge. It's a great size for a gift card or small trinket. The patterned paper is from the Yuletide pack and I used an owl from the Base and Bling Charms called Free Thinker. I tied it as an accent with some Neutral Bakers Twine. There is a small Hook & Loop Dot under the tab with the bow to make easy open/close of the purse!


All products are Close To My Heart:
--Cricut Artiste Cartridge
--Cardstock: Black, Bamboo
--B&T paper: Yuletide
--Black Small Sparkle Flourish
--Free Thinker Charm
--Neutral Baker's Twine
--Hook & Loop Dots

I'd love to be your consultant!

Now it's time to see what Melissa Robinson has to share with us.
Thanks for hopping by!

Don't forget to check out Color My Heart and see what the design team has for you. Each week we get you started with the color choices then off you go to create whatever you like. Details are in the sidebar on our home page.

Michelle


Sunday, June 15, 2014

Picture My Life Pennant Frame

Hi, it's the middle of the month and time for another Technique Blog Hop! 
Our challenge for June was to use the Picture My Life Scrapbooking Program and use it is a way other than scrapbooking! There are eight Picture My Life programs, each with a different theme.  Each theme has 122 double sided cards and a 12"x12" cover pages to bring it all together.

If you've come from {Joy's blog} you're doing great! Just click the link at the end of this post to continue to the next stop on our hop!

First I started by sorting through the cards in the Chantilly Picture My Life program and settled on these three cards.


I cut out the bicycle, small banners and heart. The bicycle is popped up with 3D Foam.
I distressed the edges and added a section on the bottom of a dry embossed piece of cardstock. The background cardstock in the frame is also mounted on 3D Foam (2 pieces stacked in each corner) to create a shadow box feel.


After all that it was embellishment time! I cut flowers from Cricut Art Philosophy and created a bouquet feel that carried the flowers from the bicycle basket onto the frame. Some bling for the flower centers, ribbon and Washi Tape trims and it was done!

All products are Close To My Heart:
--Chantilly Picture My Life Scrapbooking Program
--My Creations Pennant Frame
--Cricut Art Philosophy cartridge
--Cardstock & Inks-Twilight, Buttercup, Cotton Candy, Sweet Leaf
--Quatrefoil Embossing Folder
--Pink Glitter Gems
--Sparkles Clear Flourishes-small
--Bitty Sparkles
--Sponge Daubers
--3D Foam Tape
--Rosette Ribbon--retired**
--Pink Polka Dot Washi Tape--retired**

**June Special--Celebrate 30! See my website for details!


Now it's time to go to {Haley's blog} and see what she has to share!
Thanks for joining us on our June Technique Hop!

Have a great day!
Michelle

Friday, March 28, 2014

Color Dare #87 - Blush, Hollyhock, Ivy Lane Green, & Ivy Lane Purple

This week over at Color My Heart we've based the challenge 
on the colors in the Ivy Lane paper pack. 
The patterns are beautiful and can be used for a wide variety of projects! 


I was in the mood to make a necklace with our new Base & Bling pieces! Since the challenge is to use all the colors in the dare I was able to find a small section of the Ivy Lane paper that actually included all of the colors in a 1" circle! It's hard to tell on the photo, but honestly...they're all there!


This is the Faux Antiqued Gold chain and pendant base. There is also a very pretty Faux Antiqued Silver color as well as both circle and square pendants! The charm packs come with both 
silver and gold charms in the same pack.  

This is really a very simple project! You can use B & T paper in the pendant was well as stickers from the Style Sheets, small photos or any other item you may have. After cutting out my B & T circle I put a tiny bit of Liquid Glass on the pendant base. After placing the paper on top I rub to make sure all of the paper fit securely in the base. Next I put a few drops of Liquid Glass in the middle B&T paper. Gently place the Glass Cover on the pendant and push to spread the Liquid Glass to the edges. 

After that you just put the pendant on the 30" chain and add whatever charms and/or embellishments you like! Each chain comes with a 2" extention that is great for dangling some charms. The round white charm is actually a rhinestone. It just didn't photo very well. To add charms I used a needle nose pliers to gently open and close the jump ring.

Pendants are a great gift, either for yourself or someone else. 
Mother's Day is around the corner. 
I bet Mom would love a beautiful pendant made by you!

Click here to shop for pendant supplies to get  you started!

Don't forget to check out the Color My Heart site. 
You'll find lots of great ideas!

Happy Crafting!
Michelle


Wednesday, March 26, 2014

Video: Artbooking Made Easy: Fab Frames


Decorate picture-perfect pennant frames using Close To My Heart's Cricut® Artbooking cartridge. From flowers to snowflakes to titles, you will love the versatility, ease, and look of these artistic embellishments.

Happy Crafting!
Michelle

Monday, October 14, 2013

Holiday From the Heart Blog Hop

It's Holiday From the Heart Blog Hop time! There are so many exciting things in this book and you don't want to miss out! If you've hopped over from Judy Faye's blog you're on the right track. Click here for a list of all the consultants participating in this hop. 


 I decided to make some gift boxes with the fun papers in the Sparkle and Shine pack. So I warmed up my Cricut with the Artiste cartridge and off I went! Here is a look at some of the gift boxes I made. The large box is from Page 48 of the cutting guide. The other two are the square boxes and I just punched a hole in the top of the striped one for the treat tube.


Here is a better look at the tops. The holly and berries were cut from glitter paper and Red Shimmer trim. The poinsettia( and leaves) were made by cutting several sizes of the flower type shape on page 80 of the cutting guide. I inked the edges then curled the petals a bit. The center is dots of Stardust Glitter Gel. Other embellishments are from the Sparkle & Shine Compliments, Ruby Chevron Ribbon, Red Shimmer Tape and Washi Tape (found in Holiday From the Heart). 

You can shop from the Holiday From the Heart book from Oct. 15th - Dec. 31st. But some items are while supplies last, so get your shopping done early! 

Click here to shop now.


 Now it's time to hop over to see what Sheila has created! Thanks for stopping by. I know you'll be inspired by all the great ideas!

Happy Creating!
Michelle


Sunday, December 16, 2012

Whooo's Your Valentine? National Papercrafting Month: Jan. 2013


January is National Papercrafting Month but we're getting started a little early! Check out this video showing our Whooo's Your Valentine? kit. It's Soooooo adorable! You also get a sneak peek at a couple items coming in our Spring/Summer Idea Book that won't be live until Feb. 1t! Hint: treat tubes and glitter paper!

You can use this kit for a lot more than making Valentine treats! Check out my post below for a layout I did using this kit! Any papercraft would work with this kit!

How do you get your kit? Make a purchase from items in our current Autumn/Winter Idea Book (online or at a gathering) and this Whooo's Your Valentine Kit is yours for only $10 (value $40). What a deal!

This is a great time to stock up on the current products you love before the end of this Idea Book on Jan. 31st....and get the Whooo's Your Valentine kit, too!

Happy Stamping!
Michelle

Wednesday, October 3, 2012

Memo Board

Last weekend I attended our Close To My Heart Regional Celebration in St. Louis, MO. I had a BLAST! Not only did I get to attend a really fun, fun, fun event but I was also asked to do a presentation about our new accessories! What an honor to be asked. I'll share more later but today I'm sharing a couple photos of a memo board I made and donated to the Operation Smile Auction.

I used the Avonlea paper for this project. I LOVE the Avonlea paper! There is a wood frame I painted black. The inside has a wood base to fill the opening. On the base is a piece of sheet metal I covered in the Avonlea Teal cardstock. The rest of the base is a 12"x12" piece of cork. I left the center section as a cork board but the right side is covered with a piece of our new chalkboard paper! So you have three distinct areas: magnet, cork and chalk! 

Around the frame I added some decorations using our Cricut Artiste cartridge to make some flowers. There are Pearl Flourishes and Slate Velvet Rub-ons, too. The flower centers are more pearls and I even glued pearls to the top of the pins on the cork board! One really fun technique was to use one of our new alcohol markers (Juniper) and color some of the pearls! You can now have pearls in any of our 40 colors! Oh, I almost forgot to mention I painted a thin coating of Stardust Glitz Glitter Gel on each flower for a bit of sparkle. A piece of Slate Polka Dot ribbon is in the upper left corner as a border accent. 

The very best part was the auction. This memo board created a bit of a bidding war! It sold for over $200! Wow! That money will help a child receive life changing facial surgery! Overall, the auction brought in enough money for 3 1/2 surgeries! Operation Smile is an incredible charity and I am SO proud my efforts are helping these children.


Michelle

Monday, January 16, 2012

Sonoma Box


I love the way this box turned out. This is our CTMH recipe box but I use it as a container for thank you stamps for my customers.  The papers are from the Sonoma kit and create an old trunk kind of feel. The cover shows some paper flowers made with our Cricut Art Philosophy cartridge. Each flower has a sparkle in the center and there is a sparkle hat pin added for extra detail. The clasp on the front flap is one of our resin flowers with a crystal dangle. I added a small sparkle to the flower to match the other flower centers. A gentle pull on the crystal dangle and the lid opens right up! 

Even though this item is called a recipe box there are all kinds of uses for it! Think outside the box.....the recipe box, that is!

Michelle

Monday, February 15, 2010

Faux Leather Mini Wallet

Faux Leather Mini Wallet
This is a fun project that was easy to do! I wanted something the size for Petite Perks stamp set (3 1/2" sq.), plus a little note. Starting with a 4" x 10" strip of cardstock and using my Cuttlebug I created the faux leather background for the outside of the wallet. I also used a stamp pad for a bit of distressing. Next I scored for the folds. From the left edge I scored at 2 1/2", 3", 7", 7 1/2". Adhere a strip of Background & Texture paper to create the lining of the wallet. The side gusset is made by scoring a 1 1/2" x 2 1/2" piece of cardstock as 1/4" intervals to create the folds. Glue the gusset to the sides to create the pouch. A corner rounder on the front flap adds a nice touch.
The way you close the wallet can be done in a variety of ways. Here I simply used 2 brads and some floss. Embellish as desired and you've got a very cute way to give a little gift! By adjusting your sizes and scoring measurements you can make this idea work for any number of gifting ideas! Enjoy!

Lily of the Valley Card ~ Color Dare #724

Are you feeling creative today? Our team at Color Dare has a new palette of colors to inspire your creativity. Using shades of yellow pus ON...